Chapter 19 XYZ-Fixture-Calibration
Fixtures can be calibrated easily using XYZ values of the Visualizer. When fixtures are calibrated, you can specify a point of the stage in Vibe, and all fixtures will point to it. There are few things that need to be done in order to calibrate the fixtures, and it depends on which visualizer you use.
The following is covered in this chapter:
19.1 Calibration in WYSIWYG
Calibrate using WYSIWYG
On Vibe, go to PATCH page and tap on {FIXTURE CALIBRATION}
Tap on {Stage} button and set the stage dimensions.
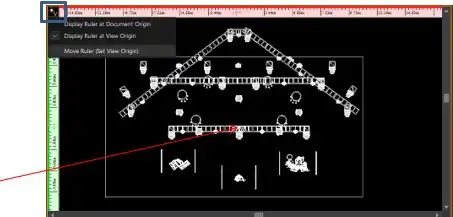
Specify the drawing origin point at the center of the stage. For this, it will be necessary to work in the CAD tab using the TOP view. Press on the top left corner (that connects the vertical ruler and the horizontal ruler – (see Blue Frame), and select the option of ’Mover Ruler (Set View Origin)ʼ.
Select the center of your stage (see Red Arrow in the Picture)
Go to ‘Data tab’.
When in the Data tab, press on Option (in the toolbar) ⟶ Document Options ⟶ Draw Defaults - and change the units to metric.
19.2 Calibration in Capture
Calibrate using Capture
On Vibe, go to patch and tap on ‘Fixture Calibration’.
Tap on ‘Stage’ button and set the stage dimensions.
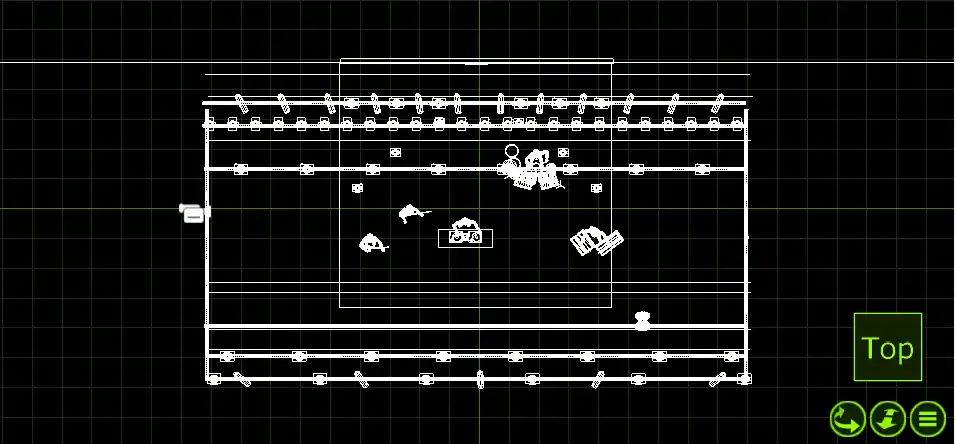
Place your center of the stage in the intersect point of the 2 Bold Axis (when the CAD displays a view from the Top).
Go to Tools ⟶ Options and change the measurements to metric.
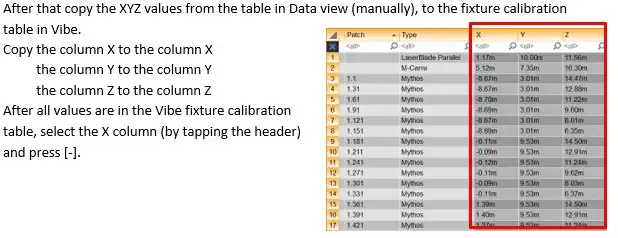
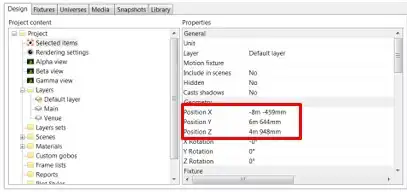
Select a fixture in the Capture, and you will see the XYZ coordinates when the table is showing ’Selected Itemsʼ.
Copy these values (manually) to the Fixture calibration table in Vibe.
Copy the column X to the column X the column Y to the column Z the column Z to the column Y
After all values are in the Vibe fixture calibration table, select the X column (by tapping the header) and press [-], and select the Y column and press [-]. Fixtures should now be calibrated.